
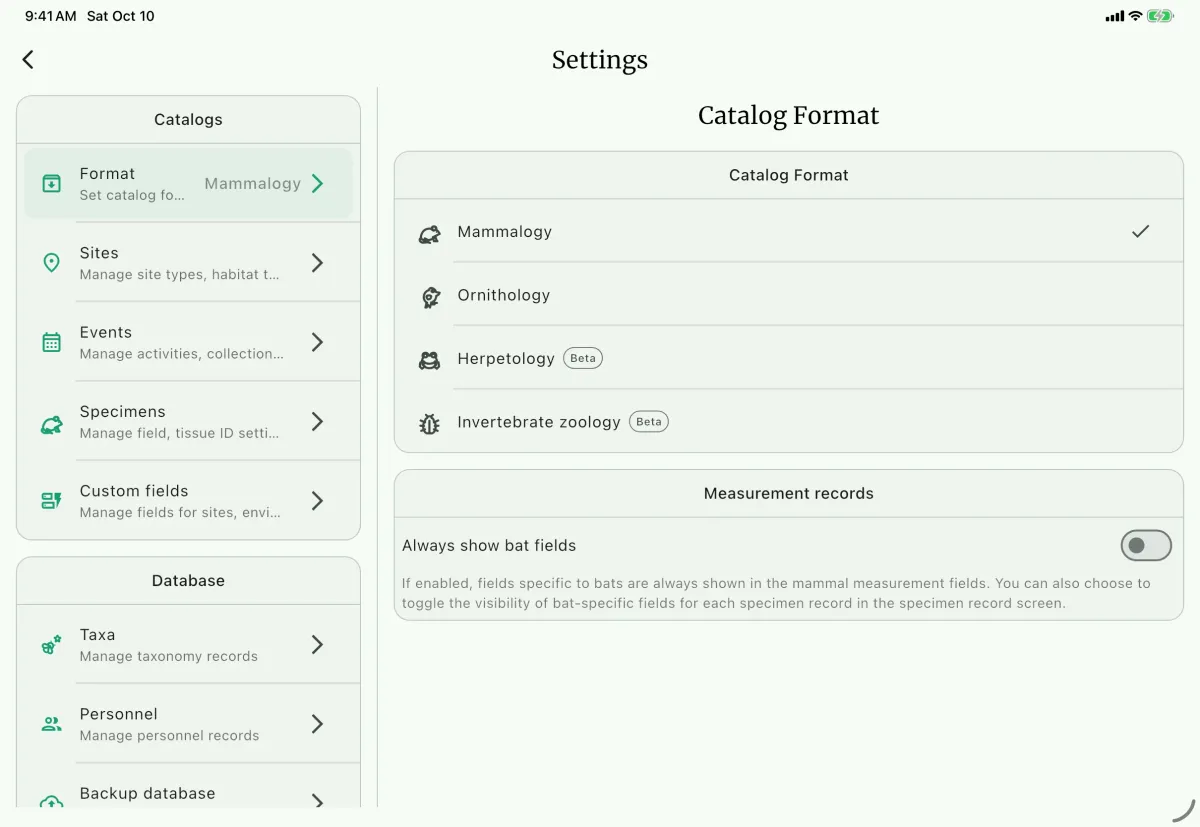
NAHPU separates project records, shared database records, reproducible user configs, and installation-only preferences. Open a project, open the Dashboard menu, and select Settings to configure the current installation.
What each setting affects
Section titled “What each setting affects”| Kind | Examples | Transfer behavior |
|---|---|---|
| Project information | Name, accession, location, time zone, dates, project field-ID values | Included in project-info and project transfers |
| Shared database records | Taxa and personnel | Stored in the NAHPU database and associated with projects |
| User configs | Controlled vocabularies and export or document presets | Transfer with Export user configs and Import user configs |
| Installation state | Theme and current main taxon | Remains on the current installation |
Changing a setting while one project is open can therefore affect other projects on the same installation. Review transferred user configs before replacing your current configuration.
Catalogs
Section titled “Catalogs”Format
Section titled “Format”Format selects A the main taxon used for new specimen forms on this device. A project can contain more than one taxon group; this setting only controls the currently active specimen format and its measurement fields.
Events and sites
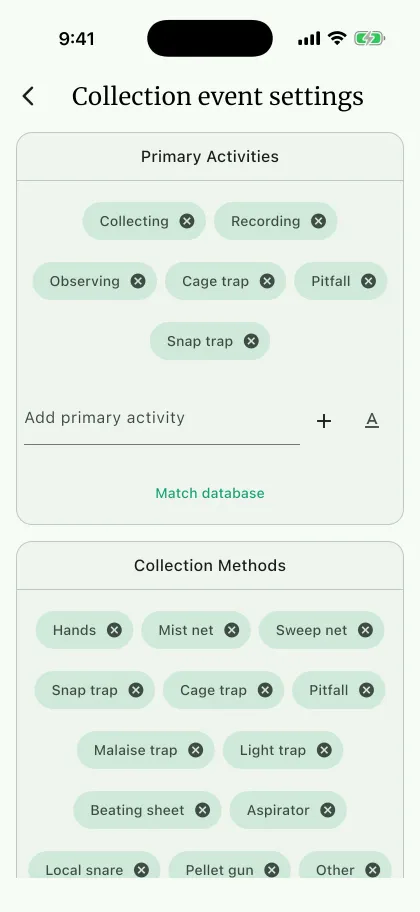
Section titled “Events and sites”Use Events C to manage the controlled primary-activity list G, collection methods, event-personnel roles, and environmental fields shown on event forms. Primary activities default to Collecting, Recording, and Observing; Other is not included unless you add it. Environmental forms initially show ambient temperature, ambient humidity, cloud cover, rainfall, and notes. Like Geography settings, the other built-in fields can be shown or hidden without deleting stored values. Use Sites B to manage controlled vocabularies for site and habitat types. Keep these settings consistent across field devices by transferring user configs.
Specimens
Section titled “Specimens”Specimens contains D capture-field visibility, field IDs, tissue IDs, specimen sexes, specimen types, treatments, conditions, and taxon-dependent parasite settings.
The specimen-sex vocabulary is restricted. Male, Female, and Unknown remain available for every taxon. Use the + chips to add Gynandromorph, Hermaphrodite, Female?, or Male? to specimen dropdowns. Optional chips can be removed only when no specimen record in the database uses that value.
Under Field ID, leave Use project ID off to use a Cataloger's initials and personal field number. The Cataloger must have the Cataloger role, field registration enabled, initials, and a current field number.
Turn on Use project ID to configure a prefix, current catalog number, suffix, and auto-increment behavior. NAHPU concatenates the three values directly. For example, NAHPU-, 120, and -M produce NAHPU-120-M.
Database
Section titled “Database”TaxaF manages taxonomy records available to projects.Personnelmanages people in the database and their specimen-care roles.Backup databasesaves a full ZIP or TAR.GZ archive of every project, record, and managed file.Replace databasereplaces the active SQLite database from a backup.
Exports
Section titled “Exports”Tabular Datamanages reusable record-export presets.Documentsmanages document templates, print-layout presets, and the fonts available to templates.Template Editorcreates and edits document templates.
Load defaults in the options menu, or in an empty preset list, lets you choose which bundled presets to add. Presets that suit any catalog format start checked; presets written for one catalog format start unchecked and are also offered in Setup NAHPU. Loading never overwrites a preset of the same name, and any preset can be deleted.
These presets are user configs. Export them when another installation must reproduce the same columns, labels, or layouts.
Applications
Section titled “Applications”Use Theme to select System, Light, or Dark. The choice applies only to the current installation.
Data usage and cleanup
Section titled “Data usage and cleanup”Open Data usage to scan the folders managed by NAHPU. The summary reports total storage, file and media counts, and space that can be reclaimed from unlinked files.
Remove unlinked files deletes files that are no longer used by any record, including leftovers from deleted media or cancelled imports. Linked files, databases and backups, custom fonts, map layers, and files outside NAHPU-managed folders are not affected. Remove an installed font from Documents > Fonts rather than from here.
The Files tree lets you inspect stored files, save a copy, or remove eligible files individually. Choose Select to work with several files. Use Clear or Select all, then choose the floating Review button to check the file count, size, and grouped locations before exporting an archive or permanently removing the files.
Choose Rescan after files have changed outside NAHPU to refresh the storage report.
Transferring user configs
Section titled “Transferring user configs”Export user configs and Import user configs are in the project Dashboard menu, next to Settings; they are not inside the Settings page. User-config transfer can reproduce controlled vocabularies and presets without replacing the project database. See Export before replacing configs or data.
Custom fields
Section titled “Custom fields ”Field definitions specify where a value belongs and how it is entered. Types are Text, Number, Yes / No, and Dropdown. Use a consistent unit in the label and project protocol for numeric observations. Scope is selected at creation: Current project applies to one project and Global to the installation. Specimen-related fields can be restricted by catalog; environmental fields belong to events.
Optional Darwin Core mappings specify an export target and field. Review their meaning in the intended export and inspect a sample output before sharing data. Mapping a field name does not validate its values. Existing values can prevent deletion; archive a field to stop using it while retaining the data. Discarding legacy values is a separate irreversible action.
Define additional fields and verify how they appear in project records.
- Open the intended project and go to
Settings>Custom fieldsE, then create a field and choose its target section. - Set
LabelandType. For a dropdown, enter the permitted options. ChooseCurrent projectorGlobalscope; global definitions apply across this installation. - For specimen-related fields, check catalog applicability. Use the reference guide for optional Darwin Core mappings.
- Save the definition, open a record in the target section, and enter a test value using the agreed unit convention. Reopen the record to check the value.
- Use
Archiveto retire a field while retaining its data, andRestoreto make it available again.Deleteis unavailable while stored values remain. - Export the definition from
Custom fieldsor include it in user-config transfer. Import it on the receiving device and verify the target section, scope, and options.