
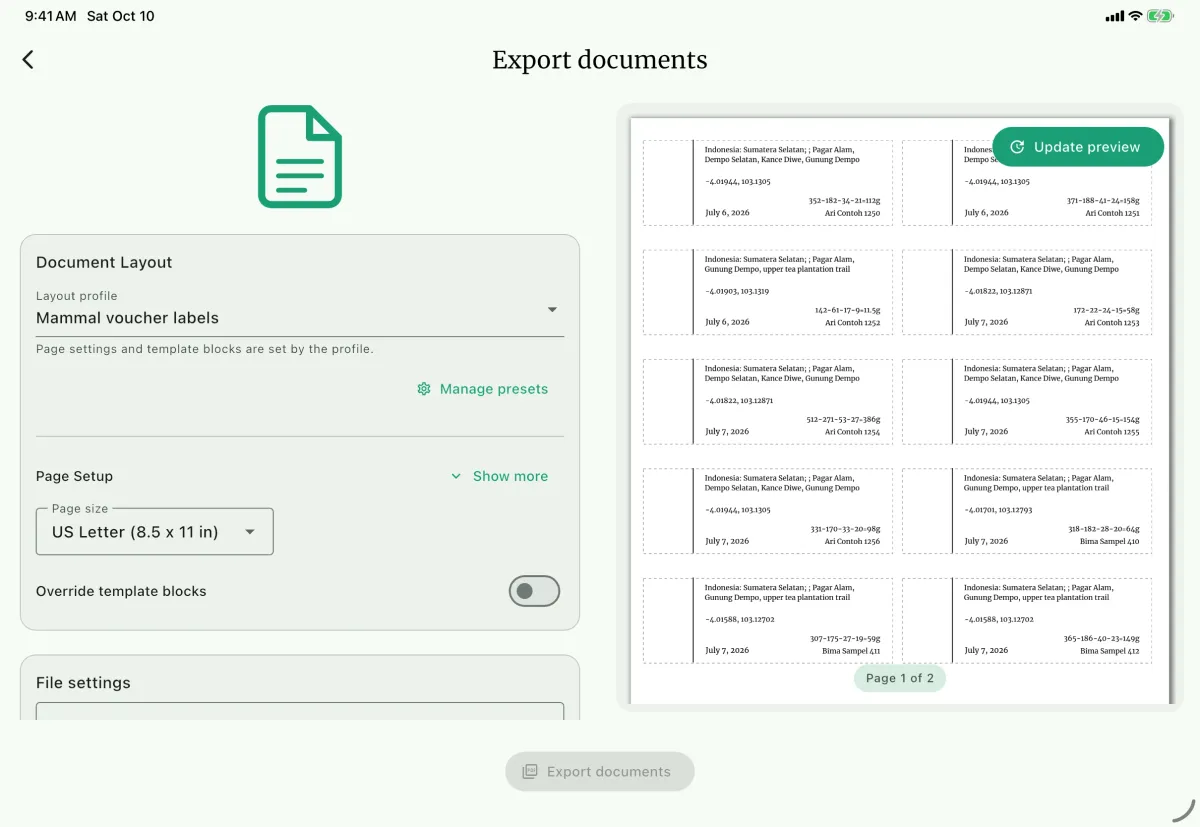
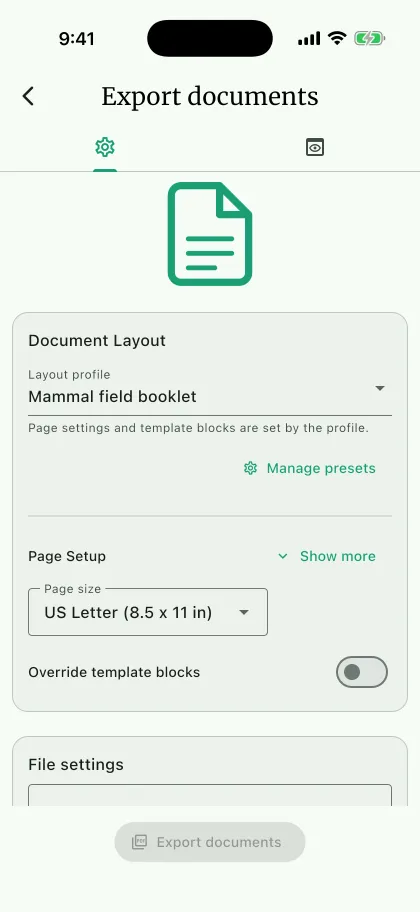
Use Export documents to create printable PDFs from NAHPU records. This is the workflow for labels, tags, sheets, reports, and other formatted documents. For tabular data, use Export records; record-export presets do not control PDF documents.
How the pieces fit together
Section titled “How the pieces fit together”Record data + Template = one populated label or document blockPopulated blocks + Print layout = pagesPages + preview/export action = PDF- A template defines the content and appearance of one block.
- A print layout defines the paper, margins, grid, order, and pagination.
- Records provide the values inserted into template fields.
Templates and print layouts are reusable app settings. Save a separate layout for each repeatable printing workflow, such as museum labels, tissue tags, or field sheets.
Quick export
Section titled “Quick export”- Navigate to the
Dashboardpage. - Open the project menu and select
Export documents. - Select a
Layout profileA. - Review the page setup, template blocks, and record selection.
- Select
PreviewC and generate a preview. - Enter a
File nameand choose the save directory when prompted. - Select
Export documentsD. - On mobile, use
Shareafter the export completes if you need to send the PDF.
Create a template
Section titled “Create a template”Open Settings > Documents E, switch to Templates, and select Create new template.
- Enter a unique
Template nameand, optionally, a shortDescriptionof up to 80 characters. - Choose the correct
Record type:Specimen,Specimen Part,Site,Collecting Event,Narrative, orNone. - Choose
1 sidedor2 sided. A two-sided template has separate Front and Back designs; the Back is preserved when one-sided mode is selected but is not printed until two-sided mode is enabled. - Set the template width and height to the size of one label, tag, or block, not the size of the sheet of paper.
- Add text, images, lines, and shapes on the canvas. Select an element to set its position, size, style, visibility, locking, and stacking order.
- Save the template with
Save template. UseSave as...when creating a variation.
Open the settings button in the template editor to change the name, description, or side count of a saved template. Renaming repoints every print layout that used the old name, so layouts keep working.
The template's record type controls which fields and records are available. For specimen templates, choose the appropriate taxon filter before selecting taxon-specific fields.
Add record fields
Section titled “Add record fields”Insert fields from the field picker in the text editor. Prefer the full Table::Field form in reusable templates, for example:
Field number: [specimen::fieldNumber]Scientific name: [taxonomy::scientificName]Locality: [site::specificLocality]Short forms such as [fieldNumber] are supported, but full names are safer when more than one table contains a field with the same name. You can combine fields with ordinary text:
[taxonomy::genus] [taxonomy::specificEpithet] - [specimen::fieldNumber]Choose the text type that matches the data:
Normal Textfor ordinary values and labels.Dates,Date and Time,Coordinates,Number, andSexfor formatted values.List Valuesfor pipe-delimited repeated values.Nested Listfor related records such as specimen parts, personnel, or effort values. Choose a table or card-list presentation.Markdownfor narrative or rich text.Encoded Textwhen stored numeric codes should be shown as labels.
Sex formatting supports text, letters, and symbols for every configured term. Uncertain values keep their suffix (Female?, F?, ♀?; Male?, M?, ♂?). Existing template conditions that compare legacy codes 0, 1, and 2 remain valid.
Every text type and format option is listed in Export expressions.
Handle empty fields
Section titled “Handle empty fields”Set No Content Placeholder on a text element to decide what an empty field prints. The control writes a ?? fallback into the placeholder:
[specimen::preparator??N/A]The five options are Blank, the field key itself, N/A, None, and a custom string. Choose the fallback before designing around the value, because a blank result and an N/A result take different amounts of space.
Conditional output
Section titled “Conditional output”A conditional expression decides at print time whether to mark a value or replace it. Build one with Conditional output in the text toolbar rather than typing it by hand; the dialog writes the syntax and reopens on an existing expression to edit it.
There are two shapes. Bracket the value when the conditions match, here to mark a weight the mammal accuracy flag says was estimated:
[[mammalAttribute::weight][mammalAttribute::accuracy~="weight"]]Or replace the value with literal text when they match, here to mark a species identification that is not high confidence:
[taxonomy::genus] [[taxonomy::specificEpithet][specimen::iDConfidence!="2"]=>"?"]]A third shape, conditional text, has no target field. It writes text when the conditions match, and optionally other text after | when they do not. Here a unit appears only when a width was recorded:
[mammalAttribute::testisWidth][[if][mammalAttribute::testisWidth!=""]=>" mm"]]The first prints [82.5] for an estimated weight and 82.5 otherwise. The second prints Rattus rattus for a high-confidence identification and Rattus ? for anything less. The third prints 6.5 mm, or nothing when the width is missing.
The symbols are:
| Symbol | Meaning |
|---|---|
[[ … ]] | Open and close the expression |
][ | Ends the target field, starts the conditions |
if | Takes the target's place for conditional text |
== != ~= | Equals, not equals, contains |
&& || | All conditions, any condition |
" … " | Wrap every comparison value and text |
]=> | Ends the conditions, starts the replacement or conditional text |
| | Separates the text written when the conditions do not match |
Conditional text can include fields, and [mammalAttribute::testisPosition#label] prints an encoded field's label; see Export expressions.
Comparisons trim surrounding whitespace and are case-sensitive. They read stored values: compare "2", not "High", for identification confidence. Use Is empty (=="") or Is not empty (!="") to test whether a source field has a value. Other comparisons do not match a blank source. Do not mix && and || in one expression.
A replacement substitutes the whole value rather than adding to it, which is why the example above prints Rattus ? rather than Rattus rattus?.
Test both the matching and the non-matching case in the preview. A malformed expression is skipped rather than reported, so it prints literally.
The complete symbol set, the three conditional types in the dialog, and the full evaluation rules are in Export expressions.
Replacement rules are the other way to rewrite a value. They run after formatting, match by exact value or substring, and can be case-sensitive or not. Use them for a repeated substitution across many values, and a conditional for a decision that depends on another field.
Design for real records
Section titled “Design for real records”Preview with records that contain the longest expected text, the largest repeated lists, missing optional values, and long identifiers. A short sample can hide overflow that appears in real fieldwork data.
For narrative text or nested lists:
- enable dynamic text sizing where the text box should grow;
- use a layout block's
Auto-fill pageoption when block height varies; - keep enough width for wrapping and enough padding for the printer;
- regenerate the preview after changing the template or layout.
For images, use a managed image path that exists on the device and verify the image after importing the template on another device. A template JSON describes the definition; it is not a copy of every external image file.
Create a print-layout preset
Section titled “Create a print-layout preset”In Settings > Documents, switch to Print layouts. Create a new layout or use Save as... before experimenting with a known-good layout. Under the preset name, add an optional description of up to 80 characters; Update saves the name and description together, and the description appears in the preset list.
Page setup
Section titled “Page setup”Choose Page size B, Orientation, custom dimensions when needed, and page padding. Page settings describe the sheet; the template describes one block.
Template blocks
Section titled “Template blocks”Add one or more Template blocks. For each block choose:
Template— the reusable block definition;Copies— how many copies to make for each record;RowsandCols— the fixed grid for a sheet;Auto-fill page— measure each block's rendered height instead of forcing a fixed row height;- template padding — space around every block;
Order byandDirection— deterministic record ordering;Page break after— force a boundary after the block.
If a layout block shows This template no longer exists, select an available replacement template before previewing or exporting. NAHPU does not silently substitute a different template.
Multiple blocks
Section titled “Multiple blocks”When a layout has multiple blocks, Multiple blocks mode controls their order:
Continuous (Block-by-block)prints all records from block 1, then all records from block 2.Alternate (Record-by-record)prints block 1 and block 2 for record 1, then block 1 and block 2 for record 2.
Use the first mode for separate sections of a packet and the second for paired outputs that should stay together.
Practical layout recipes
Section titled “Practical layout recipes”| Goal | Recommended settings |
|---|---|
| One full-page document | One block, one row, one column, fixed height |
| Fixed label grid | Set exact rows and columns, keep Auto-fill page off |
| Variable narrative sheet | Enable dynamic text and Auto-fill page; preview long records |
| Multiple copies of each label | Increase Copies on the block |
| Two-sided tag | Use a 2 sided template and verify front/back mirroring |
| Mixed packet | Add blocks and use Continuous (Block-by-block) |
| Paired record output | Add blocks and use Alternate (Record-by-record) |
Preview and export safely
Section titled “Preview and export safely”Preview is not a decorative screenshot: it exercises the same template, selection, measurement, and pagination path used for the PDF. Before exporting:
- select representative records for each block;
- check the first and last page;
- check long text and repeated values;
- check fixed-grid alignment and page padding;
- check both sides of duplex output;
- regenerate the preview whenever it is marked stale.
Edits made to the selected layout from the export screen are saved back to that layout. Use Save as... first when testing a new arrangement so an established printing profile remains unchanged.
Enter a valid File name, select the destination directory on desktop, and select Export documents. The result is a PDF; it is not a structured data export or a restorable database backup.
Open Settings > Documents and switch to Fonts to see every font available to templates. The list is in two parts: the fonts bundled with NAHPU, which are always available, and the fonts you installed yourself. The right panel previews the selected font at a size you choose, in regular, bold, and italic.
Select Install font to add a .ttf, .otf, or .ttc file from this device. Find fonts opens a font library in your browser; download the file there first, then install it here. You are responsible for the license of any font you install.
An installed font lives on that installation only. It is not part of a user-config transfer, so an installation that receives a template using it does not receive the font. Install the same font on each device that prints the template, or accept the replacement NAHPU offers on import. A font used by a saved template cannot be deleted until no template refers to it.
Import and share templates and layouts
Section titled “Import and share templates and layouts”Templates are exported from Settings > Documents > Templates, and layouts from Print layouts. Both offer two scopes: Export this ... on a row or in the options menu writes one item, and Export all ... writes every item. Both write the same file format, so either file can be imported through the same Import action. The export dialog sets the file name and folder, and Share sends the file once it is written. A layout export includes the templates its blocks use; turn off Include linked templates to export the layouts alone. Importing such a file adds the templates too, renaming one only when a different template already has its name.
Duplicate names are handled separately:
- template import asks whether to replace the existing template or use a new name, and adds a numbered suffix when several arrive at once;
- layout import creates a non-conflicting name;
- settings transfer can replace selected configuration sections atomically.
When an imported template uses a font this installation does not have, NAHPU lists the missing fonts and asks for a replacement, previewing each choice before it is applied. Nothing is stored until the replacements are chosen, so a transferred template never carries a font that cannot be rendered.
Images used by a template are referenced by name rather than stored in the exported file. A template that uses a logo warns you on export, and the image has to be added again on the receiving installation.
Layouts reference templates by name, so transfer the matching templates and layouts together. Current selected names are device-local. For a complete installation copy including project data and managed files, use Backup database instead of a settings-only transfer.
Printing specimen tags
Section titled “Printing specimen tags”Printed tags are the most common reason to use document export. Generating them from NAHPU data rather than writing them by hand has several advantages.
- Saves time in the field. Rather than writing out full specimen tags, which can easily take 10 or more minutes per tag, a faster alternative is to use small tags with identifiers such as a tissue number (e.g., "B-729113") and field number (e.g., "JPO 7299"). Then, back in a museum, you can print the final, complete tags for the specimens.
- Neater and more standardized tags. Some people have the gift of neat handwriting, whereas others are less gifted. Printing tags ensures that all the tag data is easy to read.
- Avoids errors from a repetitive, tedious task. Writing a detailed locality name with coordinates and elevational data can be tedious to write out dozens of times in the field, and human error is common. Using NAHPU, this information need only be entered once and can then be associated with each specimen via a dropdown site menu. If necessary, the locality details can also be easily updated within the app.
- Allows for a data cleanup phase. Before printing, it is easy to use a final spreadsheet to correct whacky coordinates, elevations, terminology errors, spelling, and so on.
Tag-printing workflow
Section titled “Tag-printing workflow”NAHPU can print tags directly from a template and layout preset. When you need typesetting that the built-in layouts do not cover, an external label tool remains an option:
- Export specimen data from NAHPU as a
.csvfile. - Do a final data cleanup: spellcheck, correct miscellaneous errors, and organize, combine, or split data columns as necessary.
- Upload the spreadsheet to Entomolabels. With the Entomolabels software (unfortunately only available for Windows computers) and custom tag templates, you can format the data on the specimen tag.
- Export final tag PDFs for the front and back of the tags, then combine them, alternating front and back pages.
- Use an auto-duplex printer to print the final tags.
Printing equipment
Section titled “Printing equipment”- Printer. To print tags, the NAHPU team has used the Epson WorkForce Pro WF-3820 with DURABrite® Ultra instant-dry pigment ink. Using this printer, ink, and the paper shown below, we recently printed (spring 2024) over 1000 bird specimen tags for the Louisiana State University Museum of Natural Science.
- Paper. We have used 100% cotton, acid-free paper with a weight of 250 gsm. Since this is a relatively thick and sturdy paper, we found that it was very helpful to flex the paper a bit prior to printing. Otherwise, the printer can have trouble flipping the page internally.
Archive the printed output
Section titled “Archive the printed output”Keep the digital PDF with the project archive, and keep the layout and template presets when the document must be regenerated. Review printed output before producing a complete batch, and print on suitable, durable paper. Keep the printed copy with the relevant collection records.
Do not treat printed documents as a replacement for the database, the project export, or a structured record export. See Archiving a project.
Troubleshooting
Section titled “Troubleshooting”| Symptom | What to check |
|---|---|
| A placeholder prints literally | Check the template record type and use the full Table::Field key. |
| A conditional prints literally | The expression is malformed. Check for a missing ]], an unquoted value, or mixed && and ||. |
| A condition never matches | Comparisons are case-sensitive, read the stored value rather than the displayed label, and an empty record value never matches. |
| Preview is empty | Check the block record type and select matching records. |
| A template is missing | Reassign the block or restore/import the named template. |
| Text overlaps or is clipped | Use dynamic text, Auto-fill page, a wider block, or a larger block height. |
| Unexpected blank space | Review fixed rows, template size, page padding, and template padding. |
| Records are in the wrong order | Set Order by and Direction on that block. |
| Labels repeat unexpectedly | Check Copies and the selected record list. |
| Blocks are in the wrong sequence | Change Multiple blocks mode. |
| The back side is absent or rotated | Verify 2 sided, Back content, and mirror settings. |
| Preview is marked stale | Generate a new preview after the last edit. |
| Import changes many settings | A selected-section settings import replaces that entire section. |
Every option in the template editor is listed in Export expressions. For developer-level storage and rendering details, see Templates and presets and Export workflows.