
Use the media export when you need the photographs themselves rather than the records that describe them. It is the quickest way to pull a set of field images out of a project for a grant report, a permit report, a presentation, or a colleague who does not use NAHPU.
There are two ways to export. Export one file when you want full control over its size and quality, or export a selection as a single archive when you need many files at once. Audio and video are included in a selection, but the image options below only apply to images.
Export a single file
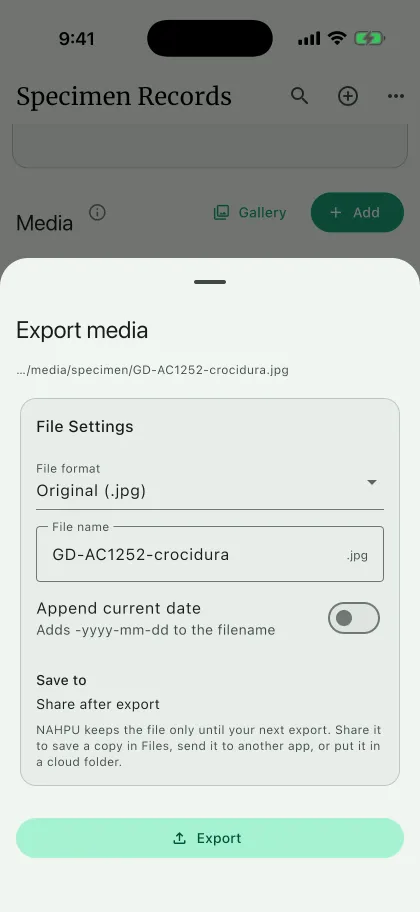
Section titled “Export a single file”Open the media item, then choose Export G.
Check the file name E. NAHPU proposes the current name of the file, and you can turn on
Append dateF to add today's date.Choose the format.
Originalalways works D.JPEG,PNG, andWebPare offered when NAHPU can read the image, which covers.jpg,.jpeg,.png, and.webpsources.Turn on
Resize imageif the file is larger than you need. The aspect ratio is locked, so typing a width updates the height, and neither value can go above the original dimensions shown above the switch.Adjust
JPEG qualitywhen exporting to JPEG. The default of 85 percent is a good balance of size and detail. Lower it for email or upload over a slow connection.Select a destination folder, then
Export. When the file is written, the button becomesShare.
Export a selection as an archive
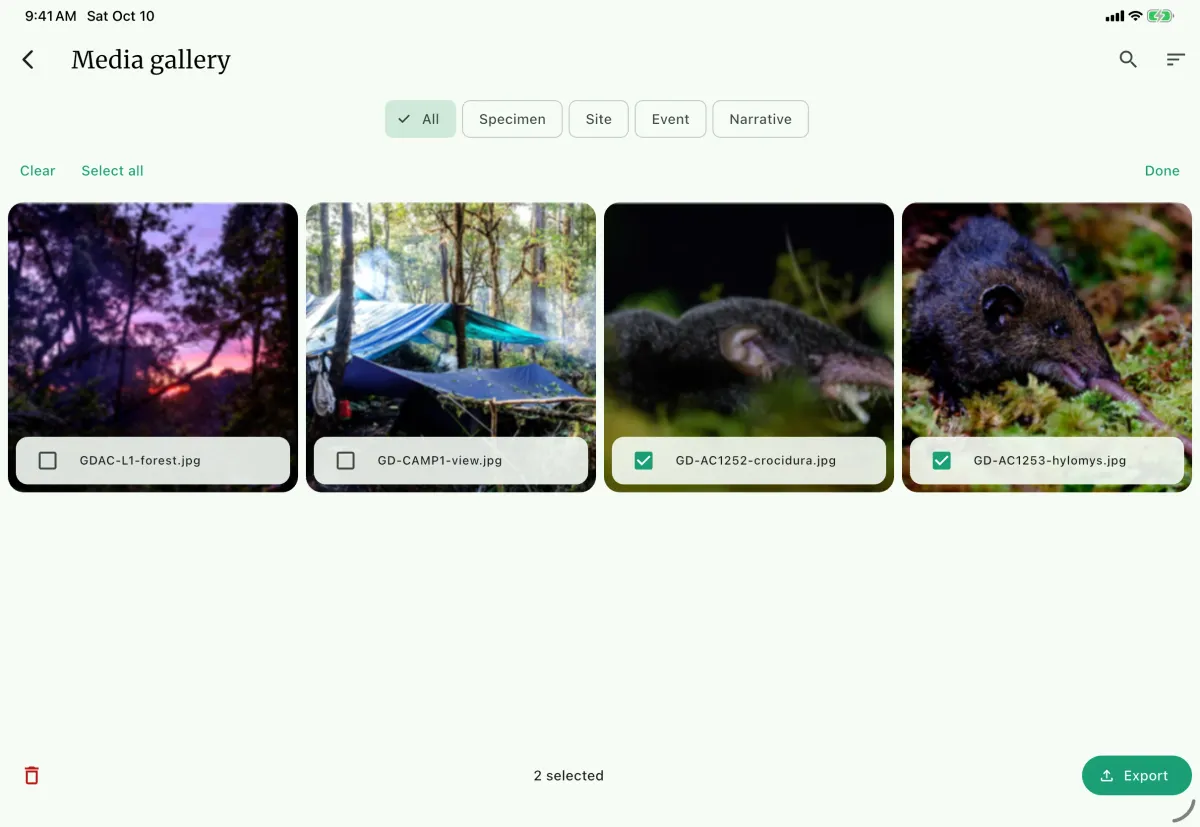
Section titled “Export a selection as an archive”Open the media gallery A from any record media panel, or use the media panel of the record itself. Turn on selection B, choose the files you want, then select Export. This opens the Export selected media C screen.
The summary lists how many files were selected, how many were found on disk, how many are images, audio, video, or other, and the total source size. Files that cannot be found are reported as warnings rather than silently dropped.
The settings panel has:
- Archive format. Choose ZIP or TAR.GZ according to the tools available to the recipient. Compare actual output sizes when transfer size matters; compression savings depend on the files.
- Image format.
Originalcopies the files unchanged.JPEG,PNG, orWebPconverts every readable image in the selection. - Limit image dimensions. Available once you convert. Enter a maximum width or height in pixels, and NAHPU constrains whichever side is longer. Images already smaller than the limit are not upscaled.
- JPEG quality. Applies when the image format is JPEG.
- File name, Append date, and the destination folder.
Inside the archive, files are grouped into specimen, site, event, narrative, and other folders so you can tell where each file came from. Audio and video are copied unchanged regardless of the image format.
Choosing settings
Section titled “Choosing settings”Choose dimensions and JPEG quality for the intended use, then inspect exported images at the required display or print size. Keep Original when preserving source files for archiving or further processing. Resizing and lossy conversion can remove useful detail; retain the originals.
Related pages
Section titled “Related pages”- Attach data and media for adding media to a record
- Export project when media should travel with the records
- Bundle records for packages that include media alongside standards-based tables