
In this tutorial you design a two-sided voucher tag for mammal specimens and print it from your NAHPU records. The tag follows the LSUMZ mammal label: the front carries the locality, coordinates, preparation date, collector, field number, and standard measurements; the back carries the species name, the prepared parts, and a QR code that links the tag to its record.
You build two things:
- a template, which describes one tag, 100 × 34 mm;
- a print layout, which places 12 tags on a US Letter sheet, front and back.
Before you start
Section titled “Before you start”You need:
- a NAHPU project with a few complete mammal specimen records. For a useful preview, include a specimen with a long locality, one with several parts, and one with a measurement flagged as imprecise in its accuracy note;
- a printer that prints on both sides, and the card stock you use for tags;
- about 45 minutes.
1. Plan the tag
Section titled “1. Plan the tag”Sketch the tag before you open the editor. Each line on the tag becomes one text element.
| Side | Element | NAHPU source | How it prints |
|---|---|---|---|
| Front | Locality | geography::country, stateProvince, county, municipality, locality | Indonesia: Sumatera Selatan; Pagar Alam, Dempo Selatan, Kance Diwe, Bandar Jaya, Gunung Patah |
| Front | Coordinates | coordinate::decimalLatitude, decimalLongitude | -4.20857, 103.31445 |
| Front | Measurements | mammalAttribute::totalLength, tailLength, hindFootLength, earLength, weight | 359-167-41-24≡216.7g |
| Front | Preparation date | specimen::prepDate | August 30, 2023 |
| Front | Cataloger and field number | personnel::name, specimen::fieldNumber | Dewi Silvestris 2116 |
| Back | Species | taxonomy::genus, specificEpithet | Maxomys inflatus |
| Back | Parts | specimenPart::type | Skin, Skull, Skeleton, Liver, Lung, Cecum, Stomach |
| Back | QR code | specimen::uuid | A scannable link to the record |
A thin vertical line on each side marks the margin where the string passes through the tag.
2. Create the template
Section titled “2. Create the template”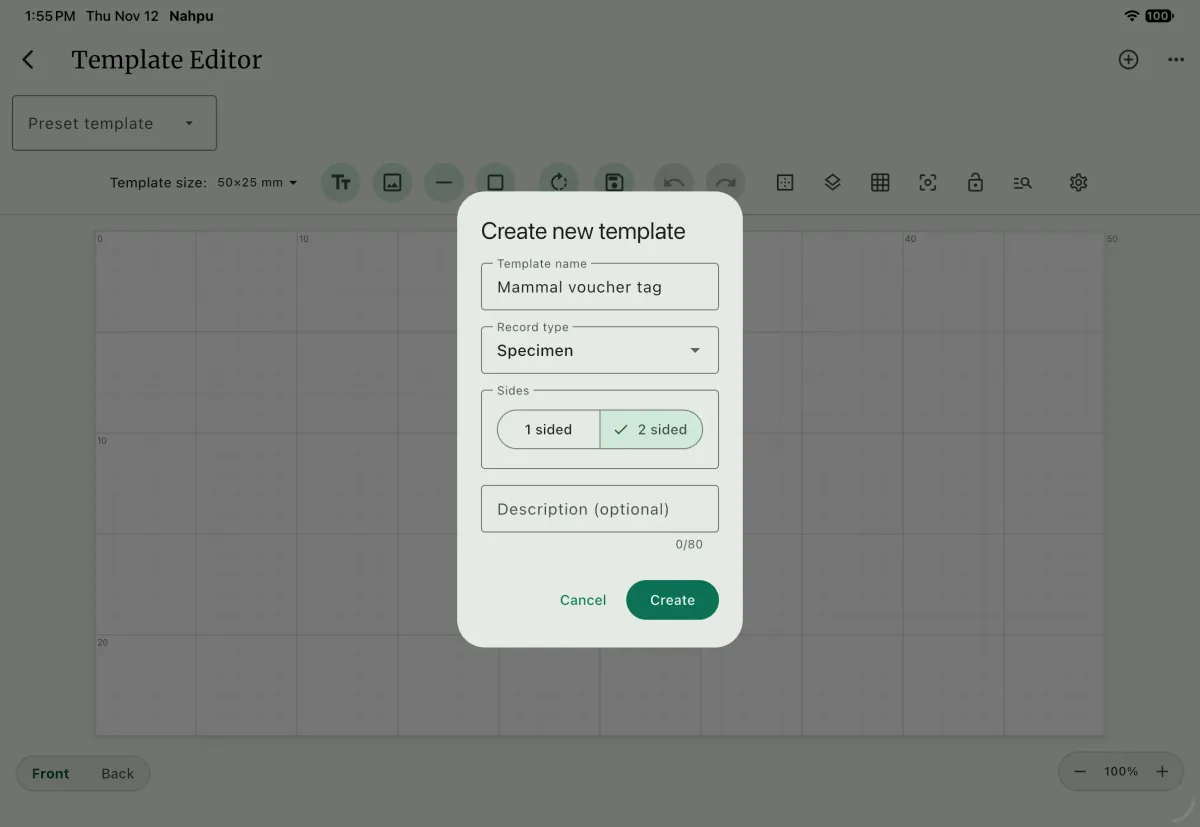
- Open
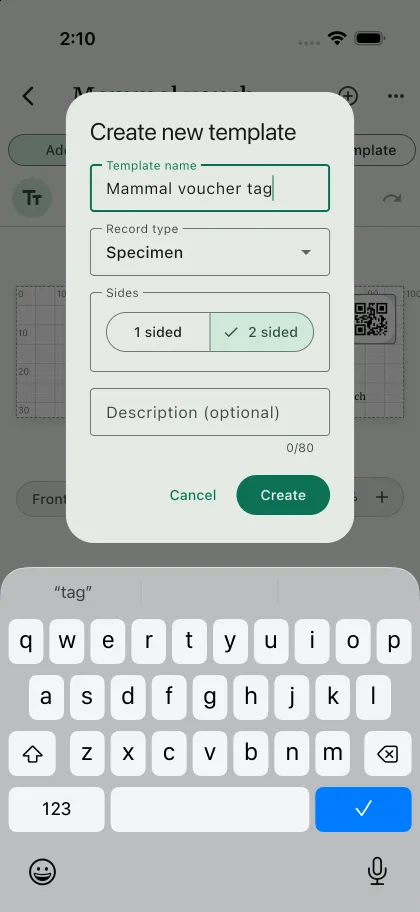
Settings>Template Editor, orTemplatesunder the dashboard'sTools, and select the add icon orCreate newin the options menu. - Enter
Mammal voucher tagas theTemplate nameA. Add a short description, such asTwo-sided LSUMZ-style mammal tag. - Set the
Record typeB toSpecimen. - Under
SidesC, choose2 sided. NAHPU creates separate Front and Back designs. SelectCreateD. - Set the template size to 100 mm wide and 34 mm high. This is the size of one tag, not of the sheet of paper. For other tag sizes, the
Template Size Presetlist includesVertebrate Specimen Tag (Medium). - Select
Save templateonce now, so later edits have a saved starting point.
Before adding fields, select Select specimen for text preview in the toolbar and choose one of your specimens. Text elements then show that record's values as you work, instead of the raw placeholders.
3. Design the front
Section titled “3. Design the front”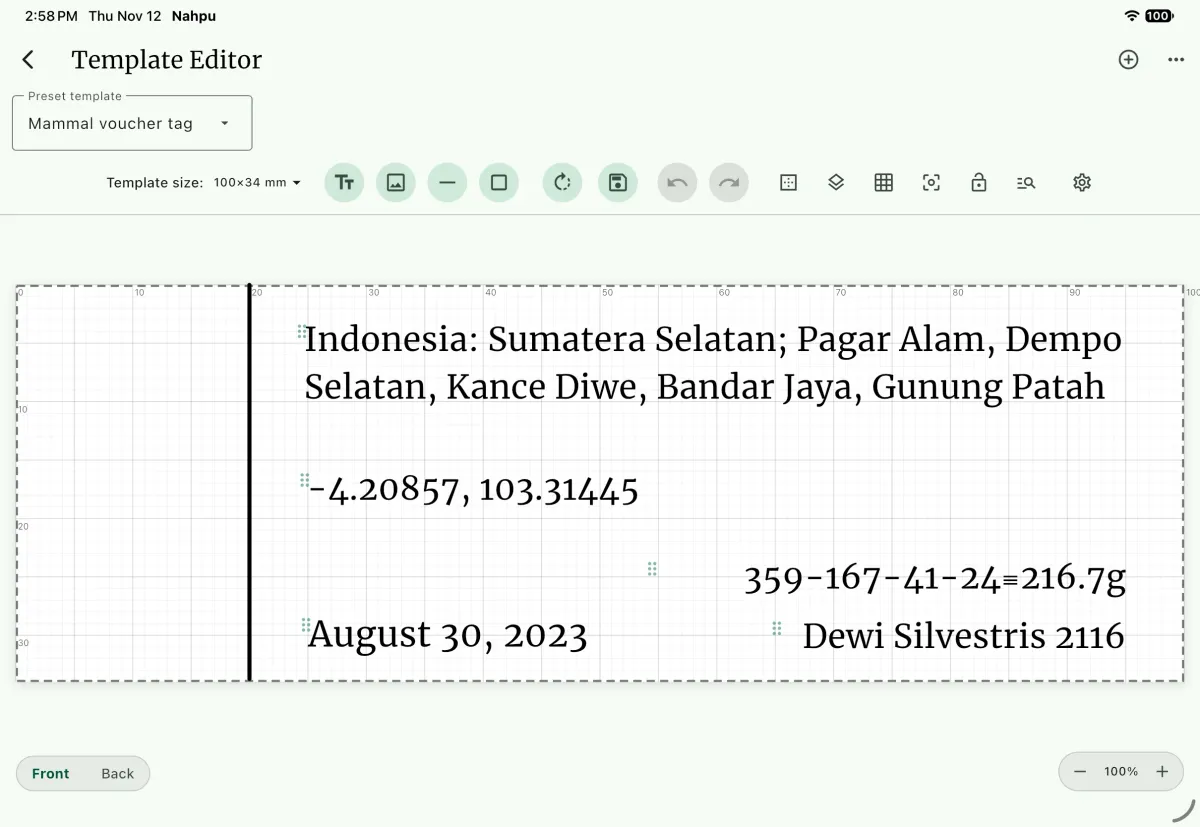
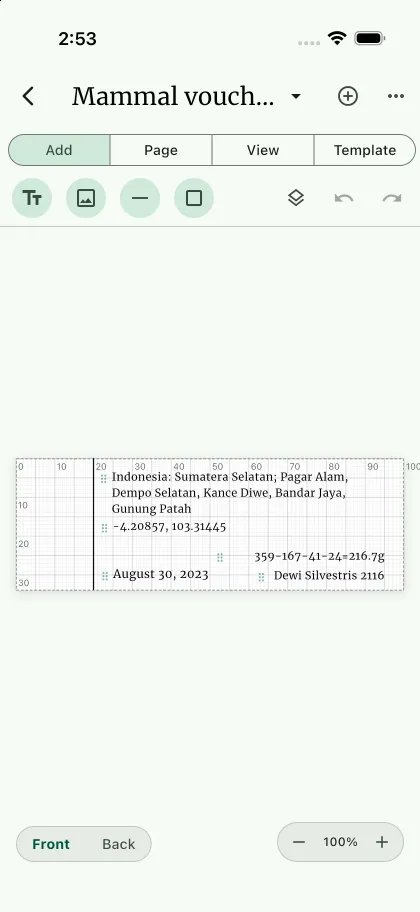
Make sure Front is selected in the switch below the canvas D. Add each element with Add text A, type or insert its content, then drag it into place. Use the grid and snapping to keep the left edges aligned.
Locality
Section titled “Locality”Select
Add textand open the new element's text input.Select
Insert Field. Set the taxon filter to mammals, then insert the geography fields and type the separators between them:[geography::country]: [geography::stateProvince]; [geography::county]; [geography::municipality], [geography::locality]Not every locality has a county. To avoid printing
; ;when it is empty, make the county and its separator conditional withConditional output:[geography::country]: [geography::stateProvince]; [[if][geography::county!=""]=>"[geography::county]; "]][geography::municipality], [geography::locality]Set the font size to 8 pt.
Set
Max Width (mm)to about 70 so long localities wrap instead of running off the tag, andMax Height (mm)to about 12 to reserve three lines.Place the element at the top of the tag, about 25 mm from the left edge.
Use the full table::field keys that Insert Field writes. A short key such as [locality] can pick the wrong field when two tables share a name.
Coordinates
Section titled “Coordinates”Add a second text element below the locality, at 8 pt:
[coordinate::decimalLatitude], [coordinate::decimalLongitude]NAHPU uses the specimen's own coordinate. When the specimen has none and its site has exactly one coordinate, NAHPU uses the site's.
Measurements
Section titled “Measurements”Standard mammal measurements print in a fixed order: total length, tail, hind foot, ear, and weight, with the three-line ≡ sign before the weight. A measurement noted as imprecise in the specimen's accuracy note prints in brackets, such as [9.5].
Add a text element and insert the five measurement fields with their separators:
[mammalAttribute::totalLength]-[mammalAttribute::tailLength]-[mammalAttribute::hindFootLength]-[mammalAttribute::earLength]≡[mammalAttribute::weight]gInsert the
≡sign fromAvailable Symbolsin theText Inputdialog, which also lists the fields you can insert.Select a measurement, open
Conditional output, and chooseConditional brackets. Set the condition field tomammalAttribute::accuracy. NAHPU fills in the matching measurement for you.Repeat for each of the five measurements. The text now reads:
[[mammalAttribute::totalLength][mammalAttribute::accuracy~="totalLength"]]-[[mammalAttribute::tailLength][mammalAttribute::accuracy~="tailLength"]]-[[mammalAttribute::hindFootLength][mammalAttribute::accuracy~="hindFootLength"]]-[[mammalAttribute::earLength][mammalAttribute::accuracy~="earLength"]]≡[[mammalAttribute::weight][mammalAttribute::accuracy~="weight"]]gAlign the element to the right with
Align rightand place it in the lower right of the tag.
On mammalAttribute::accuracy, ~= asks whether that measurement is flagged as imprecise. See Conditional output for the full syntax.
Preparation date and cataloger
Section titled “Preparation date and cataloger”- Add a text element with
[specimen::prepDate]. UnderText type, chooseDates, and underFormat, chooseMonth DD, YYYY. Set the size to 8.5 pt and place it in the lower left. - Add a text element with
[personnel::name] [specimen::fieldNumber]. Align it right and place it in the lower right, below the measurements. On a specimen template,personnelfields are the specimen's cataloger.
Dates are stored as yyyy-mm-dd, so choose the format here rather than typing the date out.
String margin
Section titled “String margin”Select Add line B, rotate it 90°, and place it about 20 mm from the left edge, across the height of the tag. The strip to its left stays clear for the string hole; keep the text elements to the right of the line.
4. Design the back
Section titled “4. Design the back”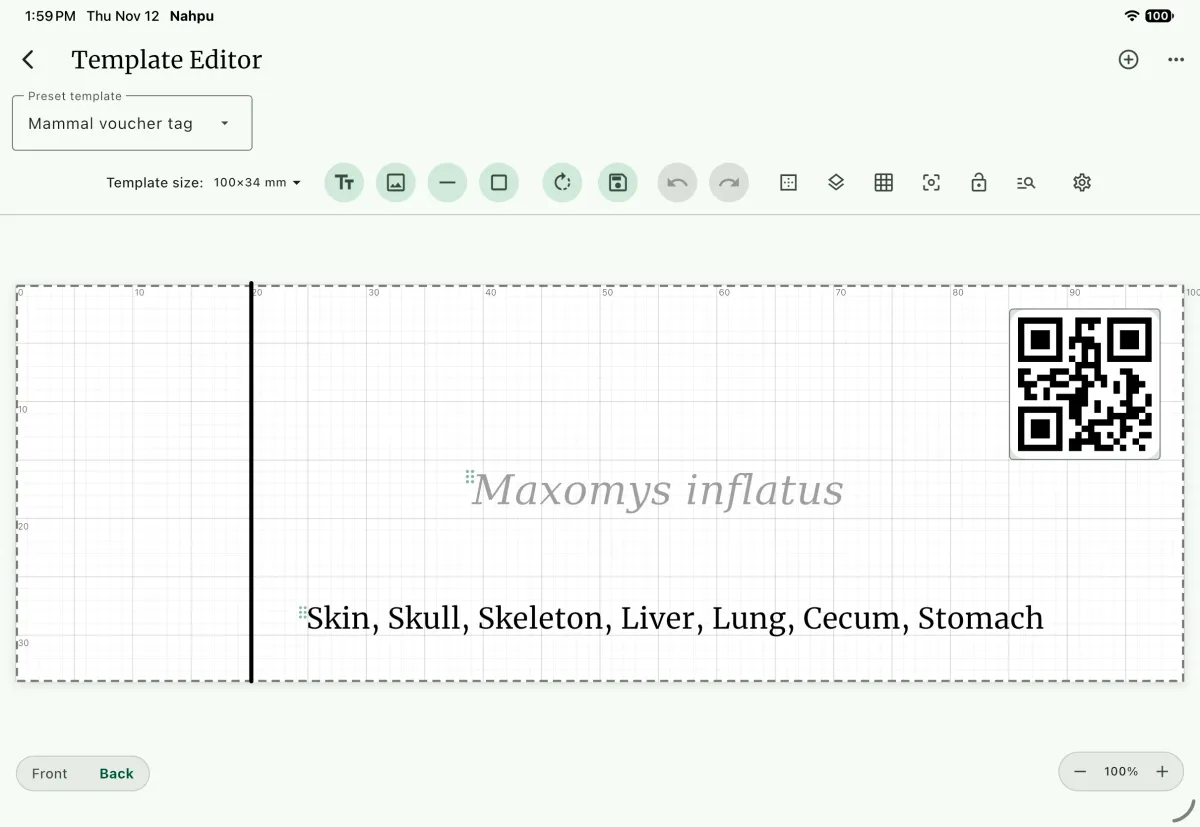
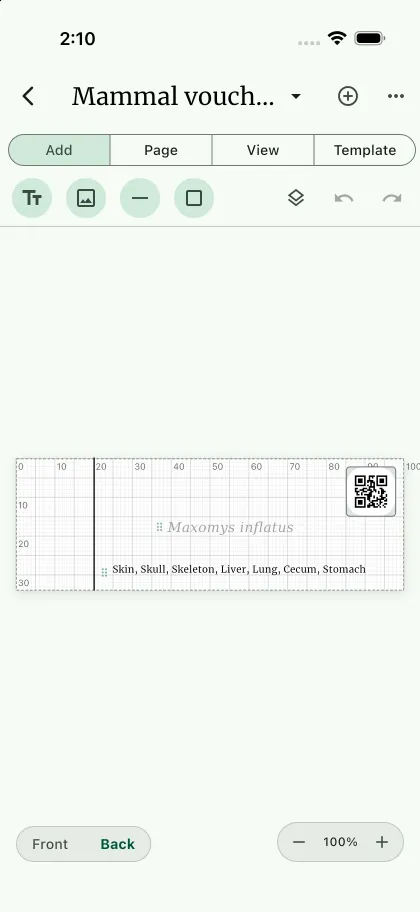
Select Back in the switch below the canvas D.
- Species A. Add a text element with
[taxonomy::genus] [taxonomy::specificEpithet]. Turn onItalic, set the size to 10 pt, and choose a serif font, such asDejaVuSerif. Place it in the middle of the tag. - Parts B. Add a text element with
[specimenPart::type]. UnderText type, chooseList Values, and underFormat, chooseComma separated (A, B, C). Set the size to 7 pt andMax Width (mm)to about 70, and place it along the bottom. - QR code C. Add a text element with
[specimen::uuid]and turn onQR Code. SetQR Size (mm)to fit the top right corner, about 12 mm. - String margin. Add the same vertical line about 20 mm from the left edge, so it lines up with the front.
The QR code stores the specimen's UUID, which stays the same when the field number or catalog number changes, so the tag always points to one record.
5. Check the template with real records
Section titled “5. Check the template with real records”Select Select specimen for text preview and switch between your test specimens. Check that:
- a long locality wraps within its box and does not overlap the coordinates;
- a flagged measurement prints in brackets, and the others do not;
- a specimen with several parts lists them all on the back;
- a missing value leaves a clean gap. To print
N/Ainstead, setNo Content Placeholderon that element.
Select Template border to show a dashed cutting outline around each tag, then select Save template.
6. Create the print layout
Section titled “6. Create the print layout”The template describes one tag. The print layout places tags on the sheet.
- Open
Settings>Documentsand switch toPrint layouts. - Create a new layout named
Mammal voucher tagsand add a description, such as12 two-sided tags per Letter sheet. - Under
Page Setup, chooseUS Letter (8.5 x 11 in)andPortrait. Set the page padding to 8 mm at the top and bottom and 4 mm at the left and right. - Under
Template blocks, set the block'sTemplatetoMammal voucher tag. - Set
Rowsto 6,Colsto 2, andCopiesto 1. KeepAuto-fill pageoff: tags need a fixed grid. - Set
Template padding (mm)to 1 on each side, so neighboring tags do not touch. - Set
Order byto the specimen's field number andDirectiontoAscending, so the tags come out in the order you file them.
Two 100 mm tags with their padding need 212 mm, which fits the 216 mm width of a Letter sheet; six 34 mm rows fit its height with room to spare. A4 is 210 mm wide, so on A4 paper reduce the page padding or the tag width.
7. Export and print
Section titled “7. Export and print”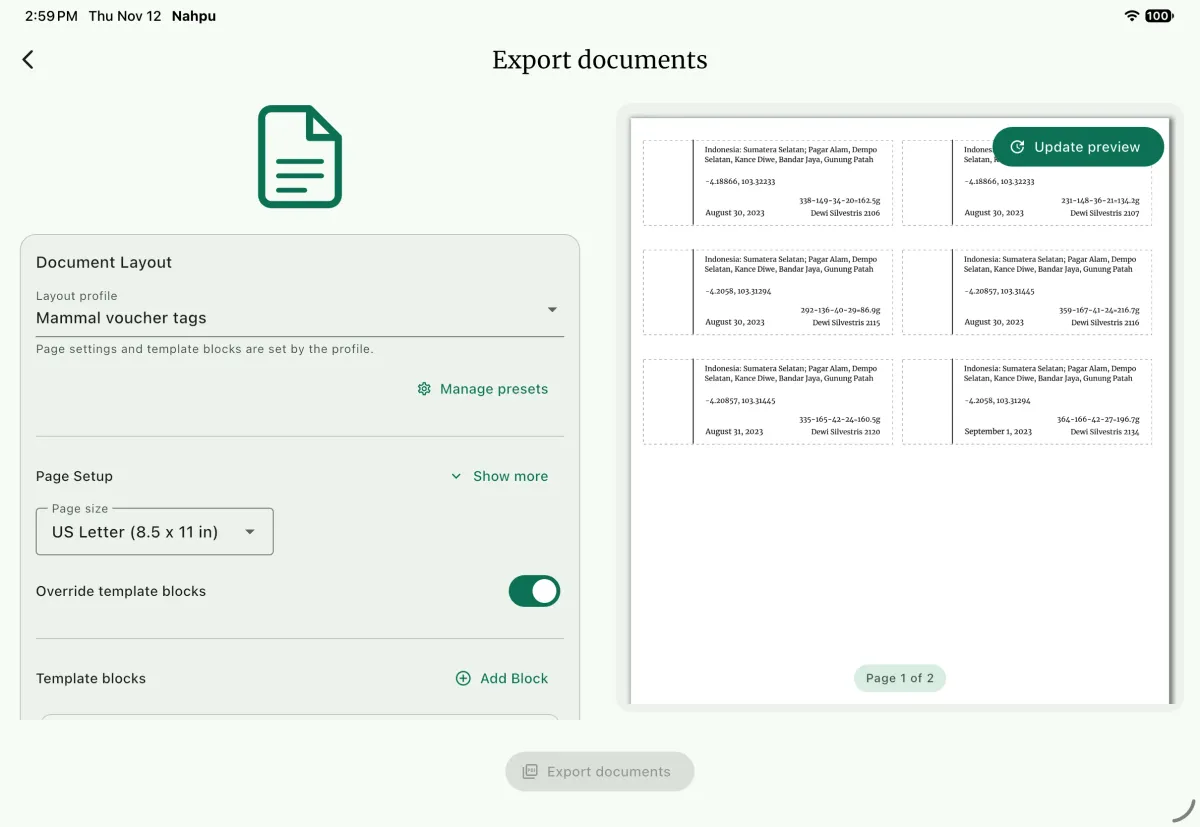
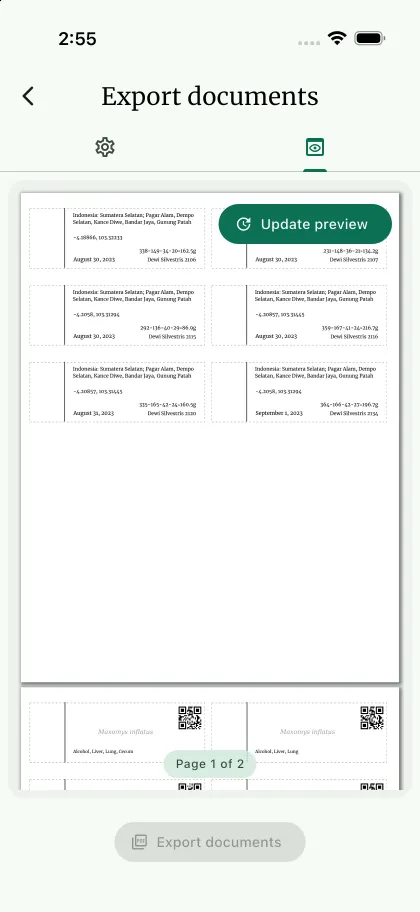
- Open the project menu and select
Export documents. - Set
Layout profiletoMammal voucher tags. - Turn on
Override template blocks. Under the block'sSpecimens Selection, selectSelect, thenClear all, and check the specimens to print. Without a selection, every specimen in the project prints. - Select
Generate previewB; on a phone, open the preview tab first. Check the first and last pages, both sides, and the tag with the longest locality. - Enter a
File name, such aspatah-voucher-tags, and selectExport documentsC. - Print one sheet on plain paper, on both sides. Hold it up to the light and check that each back lines up with its front.
- Print the full set on your tag stock, then cut along the outlines.
8. Share the tag with your team
Section titled “8. Share the tag with your team”In Settings > Documents > Print layouts, export Mammal voucher tags. The export includes the template its block uses, so colleagues receive both in one file. A custom font is not included: install the same font on each device that prints the tag, or choose a replacement when NAHPU asks during import.
What you learned
Section titled “What you learned”- A template describes one tag; a print layout arranges tags on the sheet.
Insert Fieldwrites fulltable::fieldkeys that fill from each record.Text typeandFormatturn stored values into printed dates and lists.Conditional outputbrackets imprecise measurements automatically.- A QR code of the specimen UUID ties the physical tag to its record.
- Previewing with long and incomplete records catches layout problems before you print.