
In this tutorial you build a tabular export preset that turns NAHPU mammal specimen records into a CSV file for the Specify WorkBench of the LSU Museum of Natural Science (LSUMZ) Mammalogy collection. The target is the collection's incoming-data sheet: one row per specimen, with each part written as a numbered preparation (PrepType1, PrepType1Count, PrepType1Location, PrepType2, …).
You start from an empty preset and add one kind of column at a time: plain fields, combined and blank columns, formatted values, and the specimen's parts. By the end you will have a preset named LSUMZ-mammalogy, a test export you have checked against your records, and a file the LSUMZ collection manager can map in the WorkBench.
Before you start
Sección titulada «Before you start»You need:
- A NAHPU project with a few complete mammal specimen records. Include at least one specimen with several parts, such as a skin, a skull, and a tissue with a freezer box position, so you can see how repeated values export.
- The LSUMZ Mammalogy incoming-data sheet, or another collection's column list.
- About 30 minutes.
1. Plan the columns
Sección titulada «1. Plan the columns»Write down the columns before you open the editor. The WorkBench maps columns by name, so match the sheet's spelling exactly, including spaces and case.
| Column | NAHPU source | How it is built |
|---|---|---|
Catalog Number | specimen::museumID | Single field |
Class, Order, Family, Genus, Species | taxonomy::taxonClass, taxonOrder, taxonFamily, genus, specificEpithet | Single fields |
Sex | mammalAttribute::sex | Label instead of code |
Continent | — | Blank column |
Country, State, County | geography::country, stateProvince, county | Single fields |
Locality Name | geography::municipality + geography::locality | List joined with ; |
Elevation | coordinate::elevationInMeter | Single field |
Elevation Unit | — | m when an elevation is recorded |
Collector1LastName | personnel::name | Rewritten as Last, First |
Field Number | specimen::fieldNumber | Single field |
Start Date | specimen::collectionDate | Date as dd/mm/yyyy |
PrepType1, PrepType1Count, PrepType1Location, … | specimenPart::type, count, storageLocation | Numbered part columns |
Remarks | mammalAttribute::remark | Single field |
Latitude, Longitude | coordinate::decimalLatitude, decimalLongitude | Single fields |
MaxErrorDistance | coordinate::uncertaintyInMeters | Single field |
OtherCollection OtherCollNumber | — | Blank column |
Total Length, TailLength, HFLength, Ear, Weight | mammalAttribute::totalLength, tailLength, hindFootLength, earLength, weight | Single fields |
NAHPU has no continent or other-collection number, so those two columns are written blank for the collection to fill in. Keeping them means the file still matches the WorkBench sheet column for column.
2. Create the preset
Sección titulada «2. Create the preset»Pantalla grande
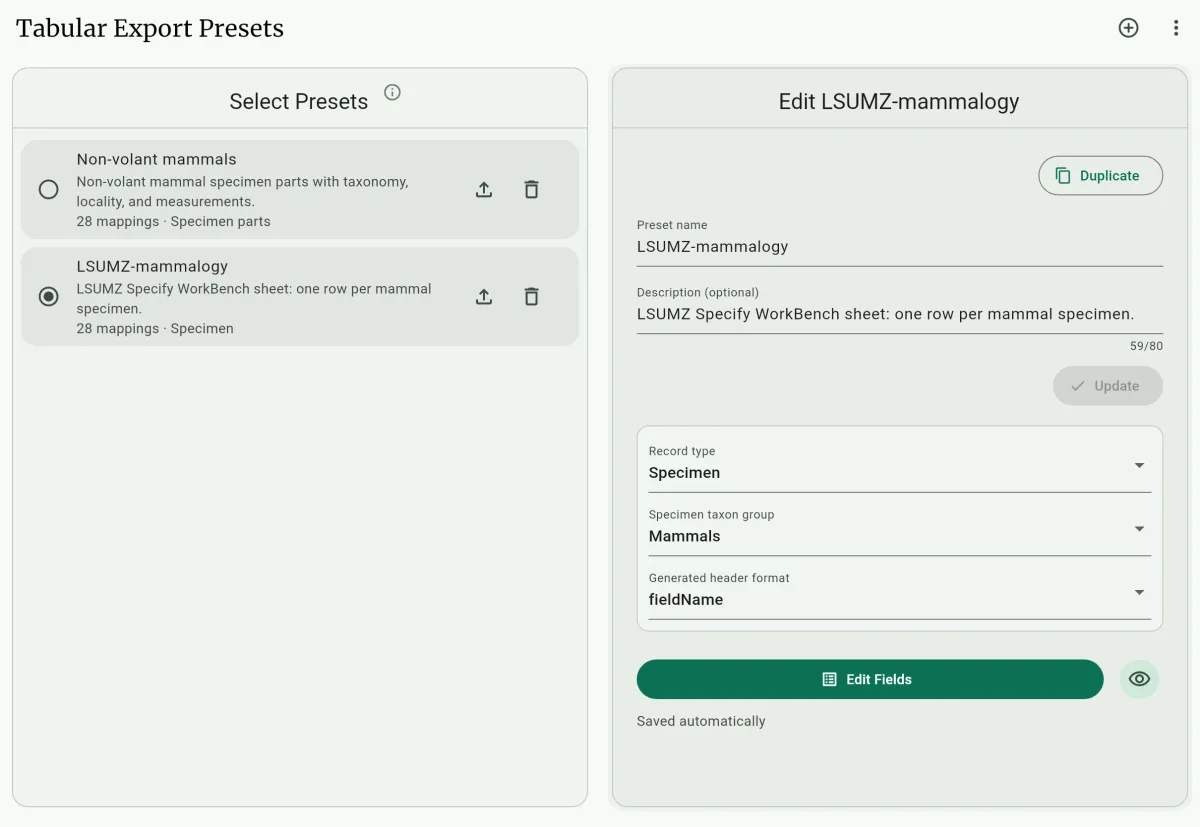
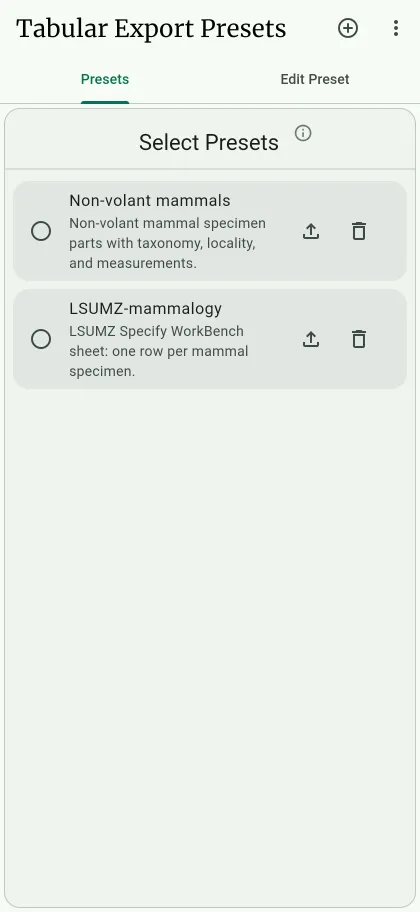
Pantalla pequeña
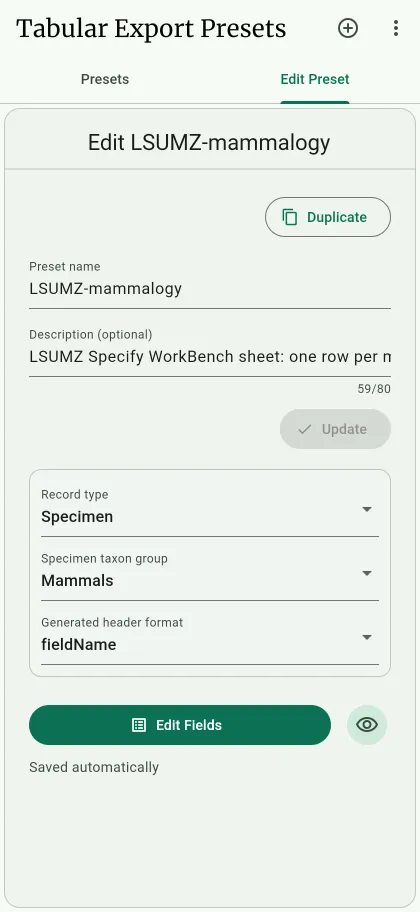
- Open
Settings>Tabular Data. - Select the add button A, enter
LSUMZ-mammalogy, and create it. Names may use letters, numbers, underscores, and dashes. On a phone, the new preset opens in theEdit Presettab. - Set
Record typeC toSpecimen. Each specimen becomes one row. - Set
Specimen taxon groupD toMammals. - Set
Generated header formatE tofieldName. You will name every column yourself, so this only matters for a column you forget to name. - Type a description, for example
LSUMZ Specify WorkBench sheet: one row per mammal specimen., and selectUpdateB.
Settings save as you change them; only the name and description wait for Update. The columns themselves are set under Edit Fields F, and the eye button G previews the export. Both are used in the steps below.
3. Add the single fields
Sección titulada «3. Add the single fields»Most columns copy one NAHPU field unchanged.
Pantalla grande
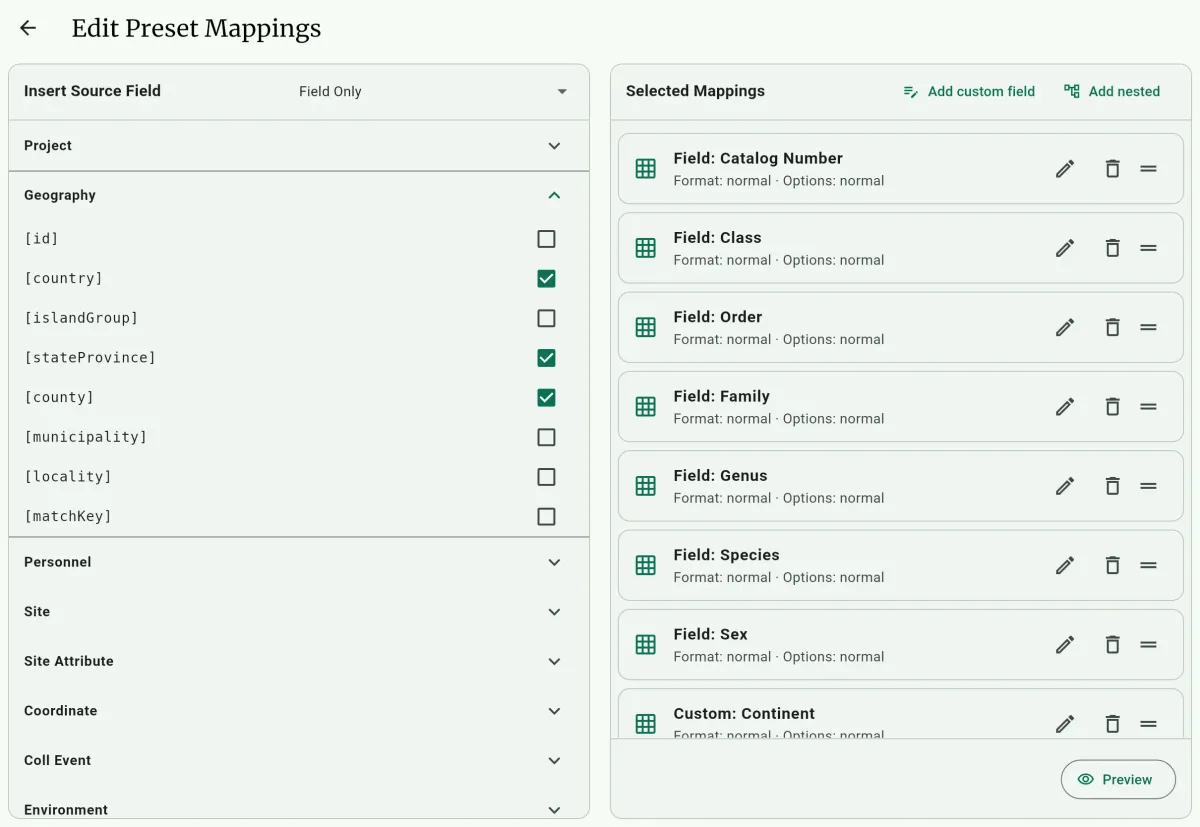
Pantalla pequeña
- Select
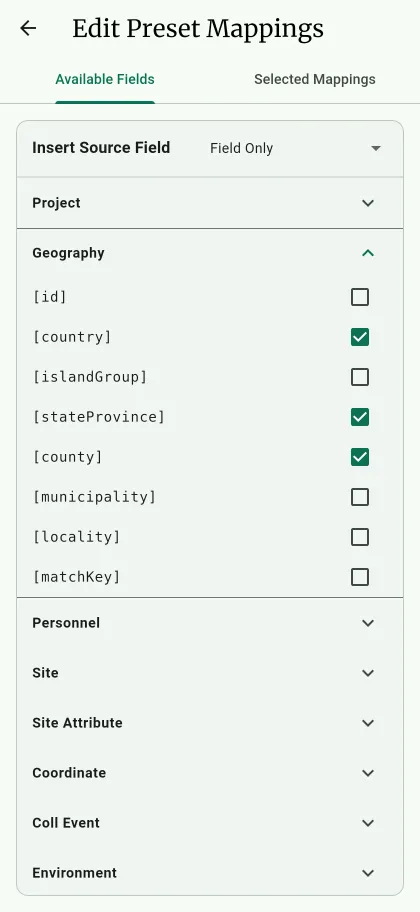
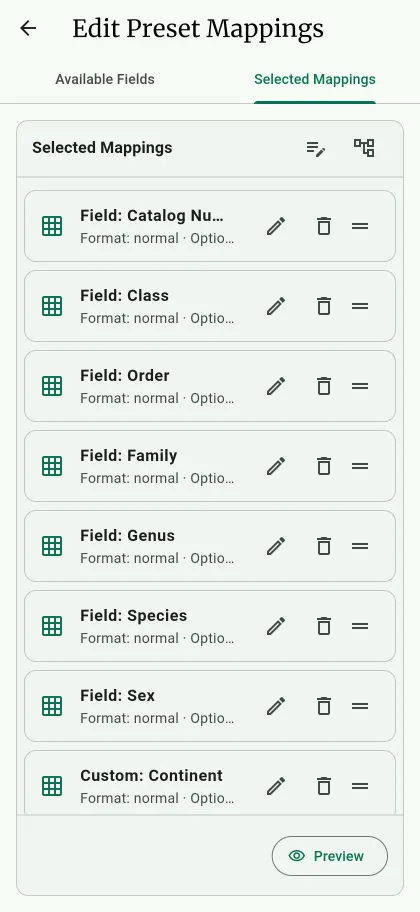
Edit Fields. TheEdit Preset Mappingsscreen lists source fields underInsert Source Fieldand your columns underSelected MappingsC. On a phone, these are theAvailable FieldsandSelected Mappingstabs. - Expand a group A and check B each field your plan marks as a single field:
museumIDunderSpecimen, the taxonomy fields underTaxonomy, the geography fields underGeography, the elevation, coordinates, and uncertainty underCoordinate,fieldNumberunderSpecimen, andremarkand the measurements underMammal Attribute. - Select the pencil F on each mapping and type the sheet's header into
Column name (optional), such asCatalog NumberformuseumIDorHFLengthforhindFootLength. SelectDoneto keep it. - Drag each mapping by its handle G into the order of your plan. You can do this at the end, once every column exists.
The other controls in Selected Mappings come next: Add custom field D in steps 4 and 5, Add nested E in step 6, and Preview H in step 7.
Pick each field from the group that owns it. For example, startDate exists under both Project and Coll Event, and neither is the specimen's own collection date, which is collectionDate under Specimen.
4. Build the composed and blank columns
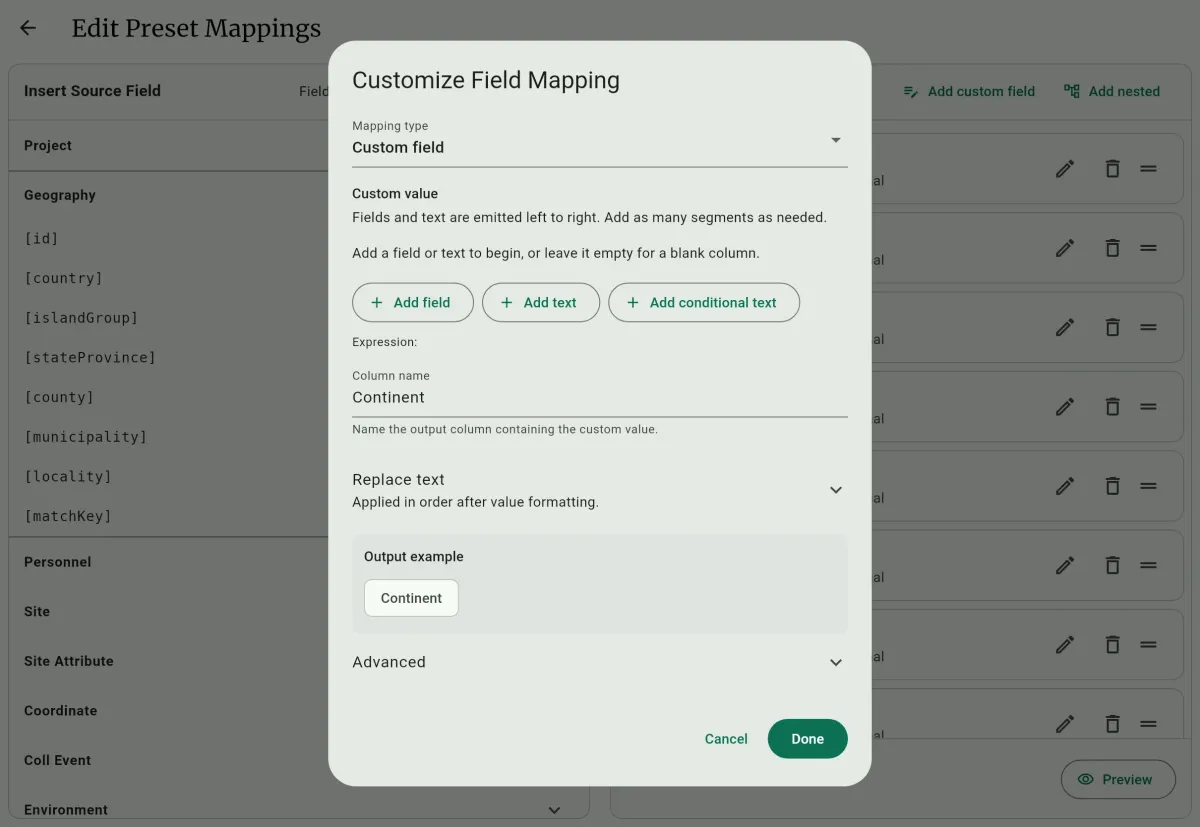
Sección titulada «4. Build the composed and blank columns»Some columns are not a single field. Build them with custom fields, which use the mapping dialog shown here: Add field B, Add text C, and Add conditional text D build the value one segment at a time. The same dialog handles the parts in step 6.
Pantalla grande
Pantalla pequeña
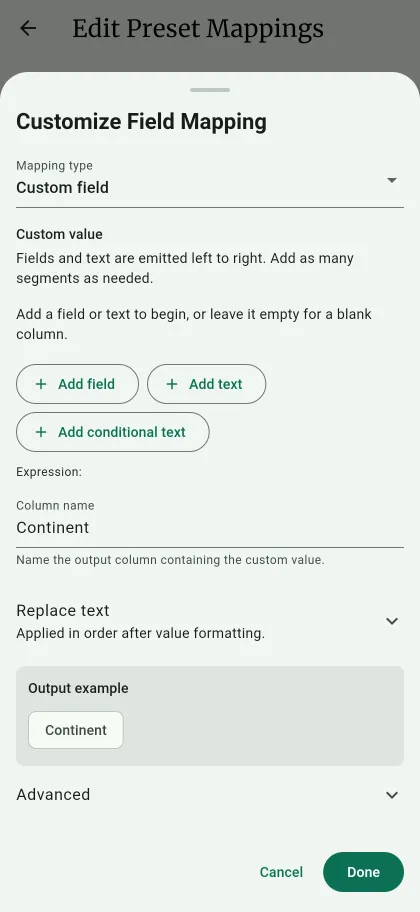
Locality Name
Sección titulada «Locality Name»Join the municipality and the specific locality with a semicolon, skipping whichever is empty.
In
Selected Mappings, selectAdd custom field. On a phone, it is the first icon beside theSelected Mappingsheading.Set
Mapping typeA toList field.Open
Advancedand paste this intoRaw source expression:[geography::municipality]|[geography::locality]Set
List outputtoOne columnandSeparatortoSemicolon (A; B).Enter
Locality Nameas the column name, then selectDone.
A record exports as Passi Timur; Mt. Ambang, or Passi Timur alone when no specific locality was recorded. See Export expressions for more ways to join geography fields.
Elevation Unit
Sección titulada «Elevation Unit»Write m only when the specimen has an elevation, so an empty elevation does not carry a stray unit.
- Add a custom field and select
Add conditional textD. - Set the condition to
coordinate::elevationInMeterIs not empty. - Enter
masText when matchedand leaveText otherwise (optional)empty. - Check that
Expression:E reads[[if][coordinate::elevationInMeter!=""]=>"m"]]. - Enter
Elevation Unitas theColumn nameF, then selectDone.
Blank columns
Sección titulada «Blank columns»- Add a custom field and leave its value empty.
- Enter
Continentas theColumn nameF and selectDone. A named custom field with no segments is written as an empty column. - Repeat for
OtherCollection OtherCollNumber.
5. Format values for Specify
Sección titulada «5. Format values for Specify»Three columns hold a NAHPU value in a different shape.
NAHPU stores sex as a code, such as 0 for male. Specify needs the word.
- Add a custom field, select
Add fieldB, and choosemammalAttribute::sex. - Select
Show labelon that segment. The expression becomes[mammalAttribute::sex#label]. - Enter
Sexas the column name and selectDone.
Use Show label the same way for any other coded field your collection imports, such as reproductiveStage. See Encoded field labels.
Start Date
Sección titulada «Start Date»- Check
collectionDateunderSpecimenand select its pencil. - Set
Value formattoDate. - Open
Advancedand enterdd/mm/yyyyas theRaw format option. - Enter
Start Dateas the column name and selectDone.
A collection date of 17 February 2016 exports as 17/02/2016. Other options include yyyy-mm-dd, mm/dd/yyyy, and dd-month-yyyy.
Collector1LastName
Sección titulada «Collector1LastName»NAHPU stores a person's full name, such as Heru Handika. The sheet wants the last name first: Handika, Heru.
- Check
nameunderPersonneland select its pencil. - Open
Replace textG and selectAdd replacement. - Set
MatchtoRegex,Findto^([^,]*[^\s,])\s+([^\s,]+)$, andReplace withto$2, $1. - Enter
Collector1LastNameas the column name and selectDone.
The rule moves the last word to the front. A name that already contains a comma is left as it is. Specify still matches the result against its agent list, so check unusual names, such as two-word family names, in the preview.
6. Add the parts as numbered preparations
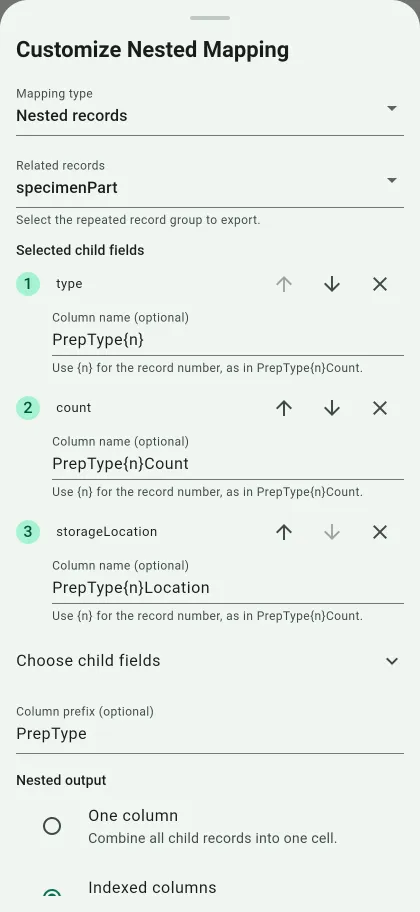
Sección titulada «6. Add the parts as numbered preparations»A specimen can have any number of parts. Write each part into its own group of columns, numbered from 1, so the WorkBench can map them to Preparation #1, #2, and so on.
- In
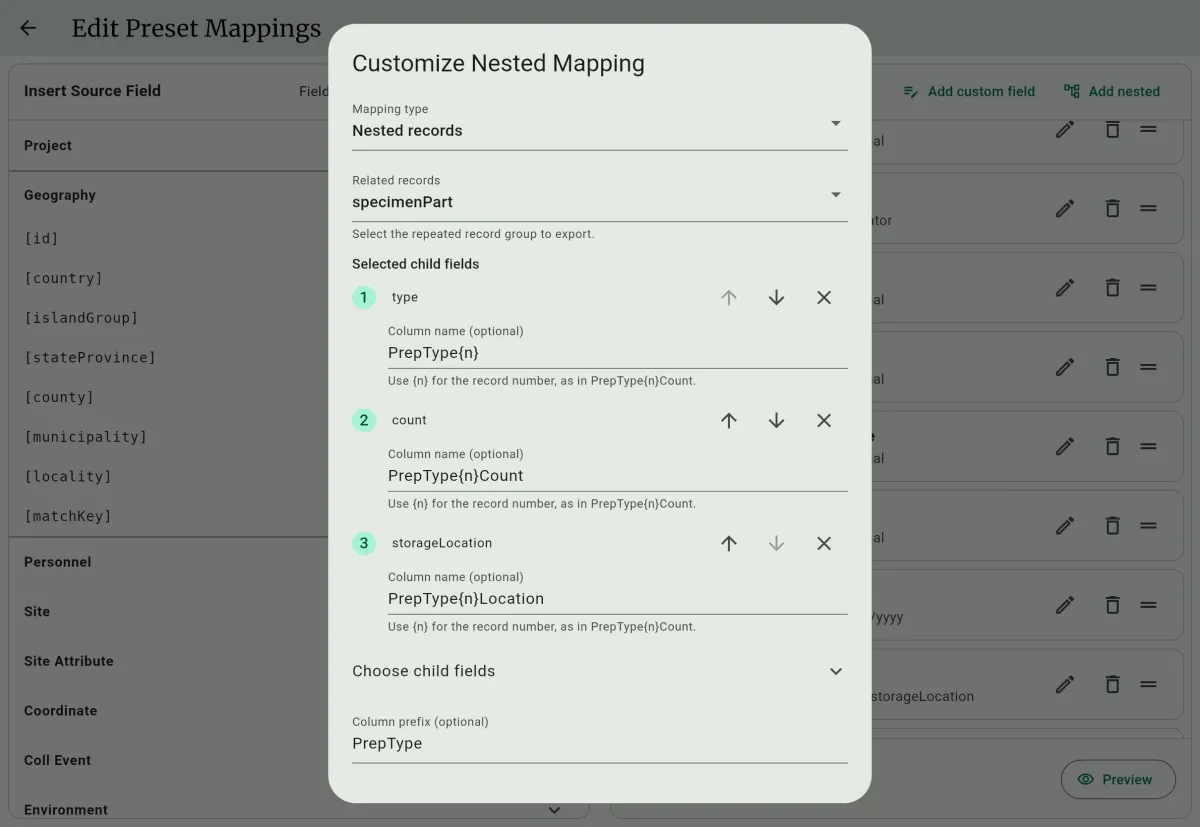
Selected Mappings, selectAdd nested. On a phone, it is the second icon beside theSelected Mappingsheading. - Set
Related recordsH tospecimenPart. - Open
Choose child fieldsJ and checktype,count, andstorageLocation, in that order. Checked fields appear underSelected child fieldsin column order. - Set
Nested outputtoIndexed columns. - Under each child field, type its column name I with
{n}where the part number goes:type:PrepType{n}count:PrepType{n}CountstorageLocation:PrepType{n}Location
- Check that the
Output exampleshowsPrepType1,PrepType1Count,PrepType1Location,PrepType2, …, then selectDone.
A specimen with a skin, skull, and tissue now fills PrepType1 to PrepType3Location, with the tissue's freezer position, such as (127,B2), in its location column. The number of groups follows the specimen with the most parts in the export, and specimens with fewer parts leave the extra columns blank.
The parts form one block, so a column cannot sit between two preparation groups. Place Remarks before or after the block; the WorkBench maps by name, not position.
7. Preview the output
Sección titulada «7. Preview the output»- Select
Previewat the bottom ofSelected Mappings, or the eye button besideEdit Fieldson the preset. - Select a few specimens, including the one with several parts.
- Check, column by column:
- the headers match the sheet exactly;
SexshowsMaleorFemale, not a code;Start Datereadsdd/mm/yyyyandCollector1LastNamereadsLast, First;- the
PrepTypegroups line up with the parts on the specimen record; ContinentandOtherCollection OtherCollNumberare empty.
Fix anything that looks wrong in Edit Fields, then preview again.
8. Export and import into Specify
Sección titulada «8. Export and import into Specify»- Open the project menu and select
Export records. - Choose the
LSUMZ-mammalogypreset andCSVas the format. - Select
Export recordsand open the file to confirm the row count. - In Specify, open the WorkBench and import the CSV as a new data set.
- Create an upload plan with Collection Object as the base table, and map each column to its Specify field.
- Validate the data set, fix any reported cells, and upload.
Save the upload plan in Specify. Because the preset always writes the same headers in the same order, the next season's export maps with the same plan.
9. Share the preset with your team
Sección titulada «9. Share the preset with your team»Back in Settings > Tabular Data, open the preset's row menu and choose Export this preset. Teammates import the file through Import, so every device in the field produces the same columns.
What you learned
Sección titulada «What you learned»- Record type decides what one row is. Use
Specimenfor one row per collection object. - Single fields copy a value;
Column name (optional)renames its header. - List fields join several fields and skip the empty ones.
- Conditional text writes a value, such as a unit, only when a field is filled.
- A named custom field with no value writes a blank column.
Show label,Date, andReplace textreshape values into what the receiving database expects.- Nested records with indexed columns spread repeated parts across numbered column groups, and
{n}in a child field's column name sets each name.